

How to make artisan chocolate at home?
Crafting Gourmet Dark Chocolate in Your Home
Forget factory-made bricks. True artisan chocolate starts with rawness—cocoa beans, wild flavors, and your own hands. It’s messy, obsessive, and soul-deep satisfying. Ready to play cocoa alchemist?
The Hard Truth First
- This isn’t melting wafers. You’ll wrestle husks, curse tempering, and babysit a grinder for days.
- Costs add up: Beans ($20-$80/kg), equipment ($300+), mistakes (oh, the mistakes).
- But: That first glossy bar you craft from scratch? Pure magic.
Step 1: Source Soulful Beans
Your chocolate’s fate hinges here.
- Find ethical suppliers: Seek heirloom Criollo/Trinitario beans (not bulk Forastero).
- Demand transparency: Farm name, fermentation method, harvest date.
- Start small: 1kg of quality beans.
Pro tip: Taste a roasted bean first—it should sing with fruit or nuts, not bitterness.
Step 2: Roast the Bean
Unlock flavor, kill bacteria.
- Home hack: Use an air fryer (135°C/275°F) or oven.
- Time: 15-30 mins.
- Crucial: Cool beans FAST to stop cooking.
Step 3: Winnowing (The Great Husk War)
Separate nibs from bitter husks.
DIY chaos:
-
-
Pulse roasted beans in a blender (2-3 seconds!).
-
Pour mix into a bowl. Blow husks away with a hairdryer (cool setting).
-
Repeat until only golden nibs remain.
-
Step 4: Grind & Conch (Where Patience Lives)
Transform nibs into silky chocolate liquor.
Tool: You NEED a stone grinder (melanger).
Process:
- Add warm nibs + sugar to the grinder.
- Grind 24-72 HOURS.
- First 12h: Paste forms.
- Next 12h+: Flavor blooms, acidity mellows.
- Add cocoa butter (optional) for silkiness.
- Conching defines personality: Less time = bright/fruity, More time = smooth/deep.Process
Step 5: Temper Like a Zen Master
For shine, snap, and melt.
The seed method (most reliable):
-
Melt ⅔ chocolate to 45-50°C.
-
Cool to 27-28°C by adding chopped "seed" chocolate.
-
Reheat gently to 31-32°C.
-
TEST: Spread a dab—it sets shiny in 3 mins? GO.
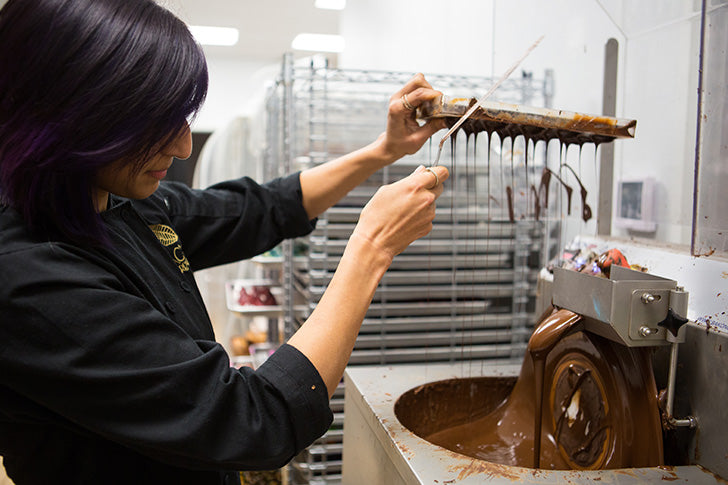
Step 6: Molding & the Agonizing Wait
-
Pour tempered chocolate into polycarbonate molds.
-
Tap HARD to release bubbles.
-
Cool at 10-18°C for 15 mins.
-
Demold: If it sticks? Temper again. Breathe.
The Artisan Manifesto vs. Supermarket Chocolate
Emulsifiers:
Supermarket Chocolate: Contains soy lecithin.
Your Home Craft: Only uses beans and sugar.
Roasting:
Supermarket Chocolate: Burnt, uniform roast.
Your Home Craft: Light/medium roast that honors terroir.
Conching Time:
Supermarket Chocolate: 4-hour conching.
Your Home Craft: 48-hour conching for depth.
Source of Beans:
Supermarket Chocolate: Anonymous beans.
Your Home Craft: Farmer-known, ethical beans.
Why Bother?
- Taste terroir: Your 70% Peruvian bar will taste nothing like store-bought.
- Control: Add Himalayan salt, cardamom, or smoked almonds—no rules.
- Pride: "I made this" > any store label.
Start Smarter (Not Harder)
-
Take a workshop (master tempering first!).
-
Buy pre-winnowed nibs (skip the husk-pocalypse).
-
Begin with couverture: Melt/temper high-quality chocolate for truffles or bars.
“Making artisan chocolate is 10% inspiration, 40% sweat, 50% staring at thermometers.”
— Every Home Chocolatier
Crave the Craft But Respect the Hustle?
We get it. If DIY feels daunting (or your kitchen’s coated in cocoa dust), explore bars from masters who’ve perfected the craft.
At Cacao & Cardamom, we curate small-batch magic:
Single-origin bars celebrating terroir
Ethically sourced from obsessed makers
Tempered, conched, and loved—so you savor the glory.
How to make artisan chocolate at home?
By Sandeep Pamnani
In Artisan chocolate, Fancy chocolate bars, Gourmet dark chocolates
